
tailwindcss 设置css变量,实现主题配色样式切换
前言
tailwindcss是有一个什么Dark Mode 的,但是我觉得这个,不够用,也不好用。翻了网上的一些方法,发现还是css变量的方式更加好用,在这里做个记录。
思路
首先,我们按照正常的思路来,想要实现网页的主题切换。我们只需要准备几套配色,然后在切换相应的标记来应用即可,非常简单,就如非常常见的html标签上的 data-scheme="light"等,下面我用的是body的类名来切换。
定义变量
在你自己的tailwind.css中定义即可,直接看代码:
@tailwind base;
@tailwind components;
@tailwind utilities;

@layer base {
.light {
--bg-base: #f8fafc;
--bg-primary: #ffffff;
--bg-secondary: #111;
--text-base: #757575;
--text-active: #50a1ff;
}
.fugu {
--bg-base: #f2efdd;
--bg-primary: #f7f5ea;
--bg-secondary: #eeebd4;
--text-base: rgba(17,19,14,.7);
--text-active: #baaa49;
}
.huyan {
--bg-base: #c7ebca;
--bg-primary: #d4f0d6;
--bg-secondary: #bee8c1;
--text-base: rgba(16,20,16,.7);
--text-active: #3da946;
}
.haitian {
--bg-base: #dce2f1;
--bg-primary: #e9edf6;
--bg-secondary: #d3daed;
--text-base: rgba(16,20,16,.7);
--text-active: #4a69b7;
}
.dark {
--bg-base: #16202f;
--bg-primary: #1c283b;
--bg-secondary: #121a26;
--text-base: rgba(160,180,200,.9);
--text-active: #50a1ff;
}
.black {
--bg-base: #171717;
--bg-primary: #202020;
--bg-secondary: #111;
--text-base: #d4d4d5;
--text-active: #50a1ff;
}
}
@layer base {}中正常定义即可
config 应用
接下来修改在tailwind.config中的配置,以使用:
/** @type {import('tailwindcss').Config} */
export default {
  content: [
    "./components/**/*.{js,vue,ts}",
    "./layouts/**/*.vue",
    "./pages/**/*.vue",
    "./plugins/**/*.{js,ts}",
    "./app.vue",
    "./error.vue",
  ],
  theme: {
    extend: {
      backgroundColor: {
        'base': 'var(--bg-base)',
        'primary': 'var(--bg-primary)',
        'secondary': 'var(--bg-secondary)',
      },
      textColor: {
        'base': 'var(--text-base)',
        'active': 'var(--text-active)',

      },
    },
  },
  plugins: [],
}
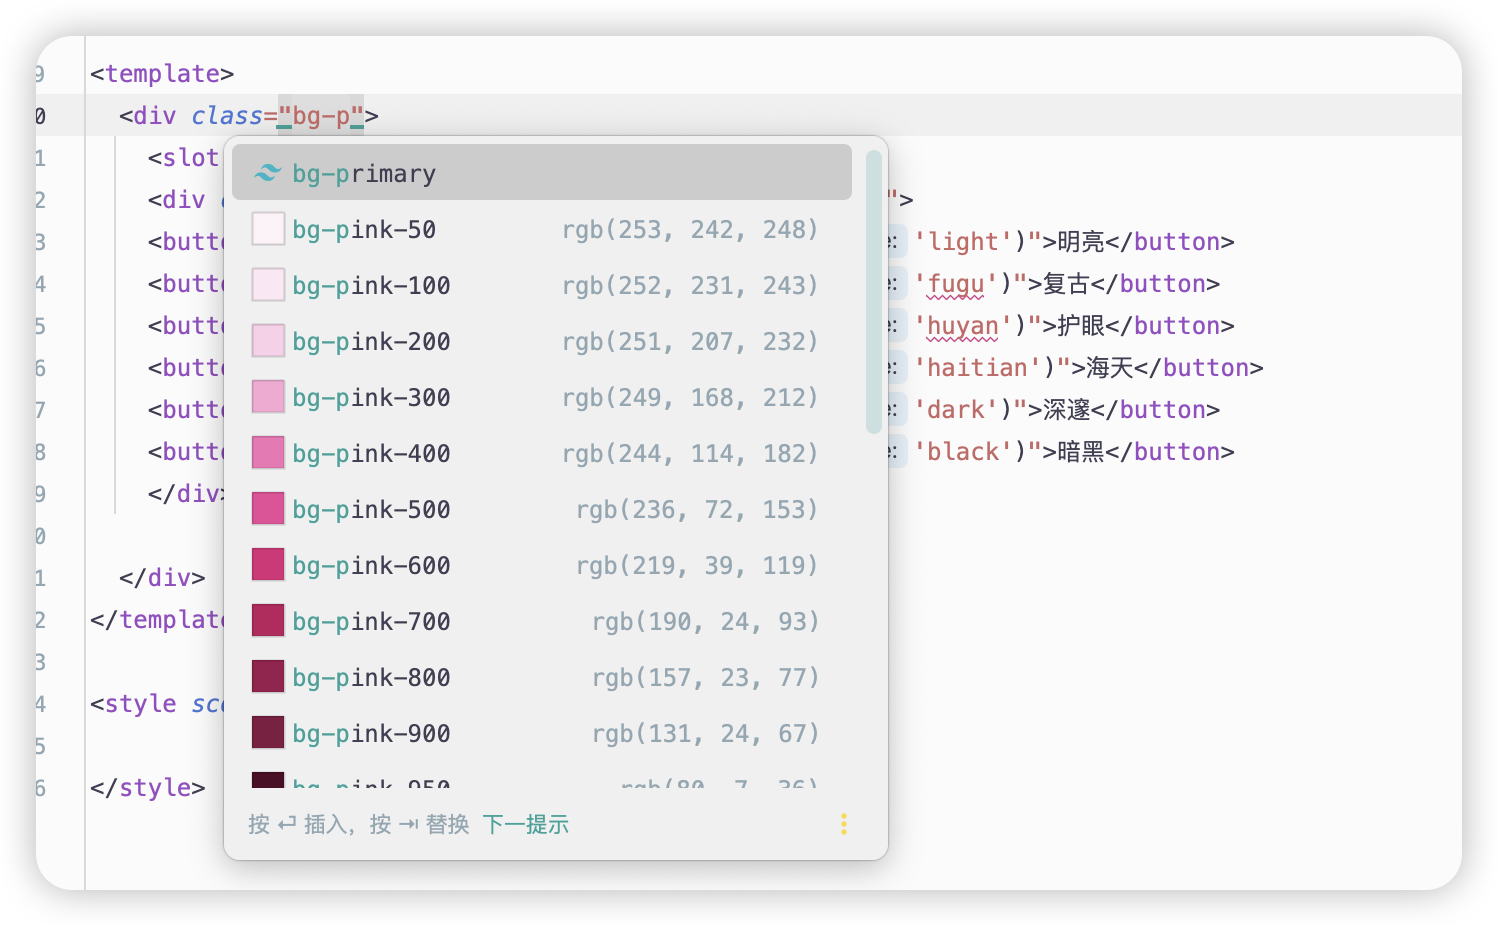
修改内容就是theme.extend 里面的配置,例如backgroundColor中设置了三个自定义变量,随后就可以在页面中使用bg-base应用。
可以看到,这也是直接就有代码提示的。Tailwind 中有个样式是text-opacity-10 设置了字体颜色,还可以设置透明度。
.text-gray-900 {
    --tw-text-opacity: 1;
    color: rgba(17,24,39,var(--tw-text-opacity));
}
如想要支持这个透明度的样式,我们还需要将颜色转成Rgb,tailwind.config.js 配置
/** @type {import('tailwindcss').Config} */

function withOpacity(variableName) {
    return ({ opacityValue }) => {
        if (opacityValue) {
            return `rgba(var(${variableName}), ${opacityValue})`;
        }
        return `rgb(var(${variableName}))`;
    };
}

export default {
  content: [
    "./components/**/*.{js,vue,ts}",
    "./layouts/**/*.vue",
    "./pages/**/*.vue",
    "./plugins/**/*.{js,ts}",
    "./app.vue",
    "./error.vue",
  ],
  theme: {
    extend: {
      backgroundColor: {
        'base': withOpacity('var(--bg-base)'),
      },
    },
  },
  plugins: [],
}
效果
<script setup lang="ts">
const changeTheme = (theme: string) => {
  document.body.classList.remove('light', 'fugu', 'huyan', 'haitian', 'dark', 'black')
  document.body.classList.add(theme)
}

</script>

<template>
  <div class="bg-p">
    <slot />
    <div class="bg-green-400 flex flex-row justify-center">
    <button class="basis-1/6" @click="changeTheme('light')">明亮</button>
    <button class="basis-1/6" @click="changeTheme('fugu')">复古</button>
    <button class="basis-1/6" @click="changeTheme('huyan')">护眼</button>
    <button class="basis-1/6" @click="changeTheme('haitian')">海天</button>
    <button class="basis-1/6" @click="changeTheme('dark')">深邃</button>
    <button class="basis-1/6" @click="changeTheme('black')">暗黑</button>
    </div>

  </div>
</template>

<style scoped>

</style>
这里简单加了几个按钮用来修改类。
<div class="w-full">
  <div class="w-full h-[50px] bg-base">
    'base': 'var(--bg-base)',
  </div>
  <div class="w-full h-[50px] bg-primary">
    'primary': 'var(--bg-primary)',
  </div>
  <div class="w-full h-[50px] bg-secondary">
    'secondary': 'var(--bg-secondary)',
  </div>
  <div class="w-full h-[50px] text-base">
    'base': 'var(--text-base)',
  </div>
  <div class="w-full h-[50px] text-active font-bold">
    'active': 'var(--text-active)',
  </div>

</div>
然后简单在页面展示一下。就可以得到一下效果。
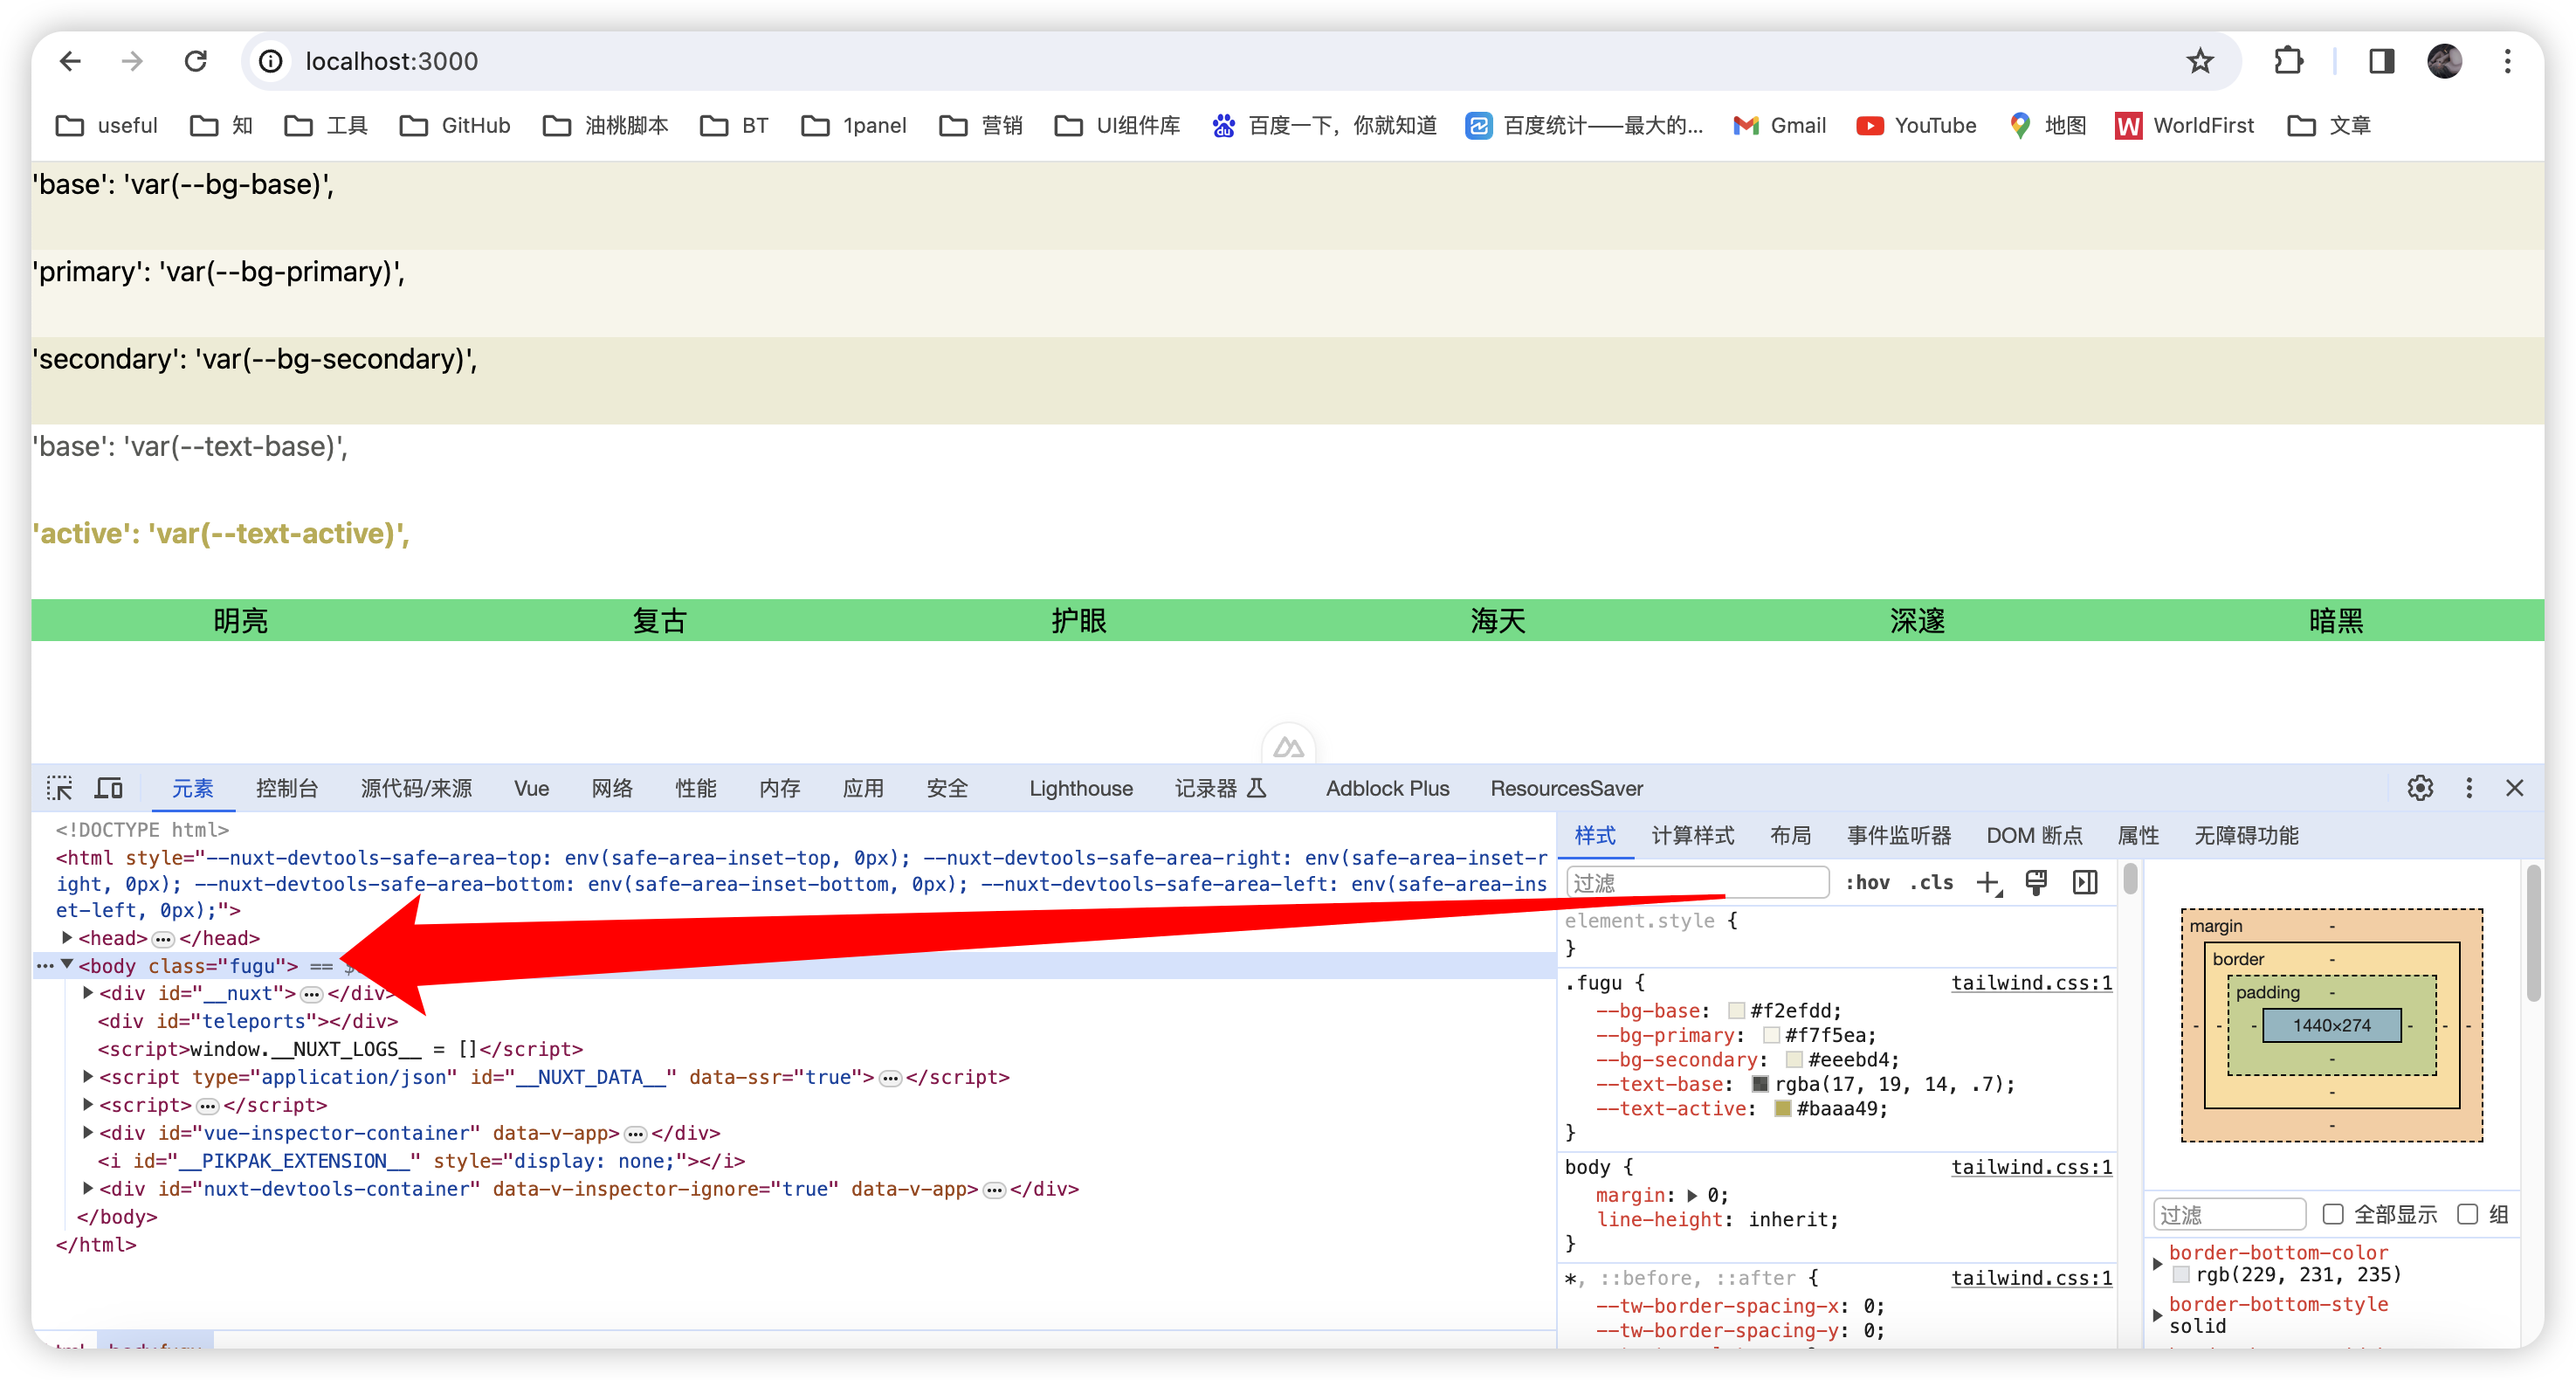
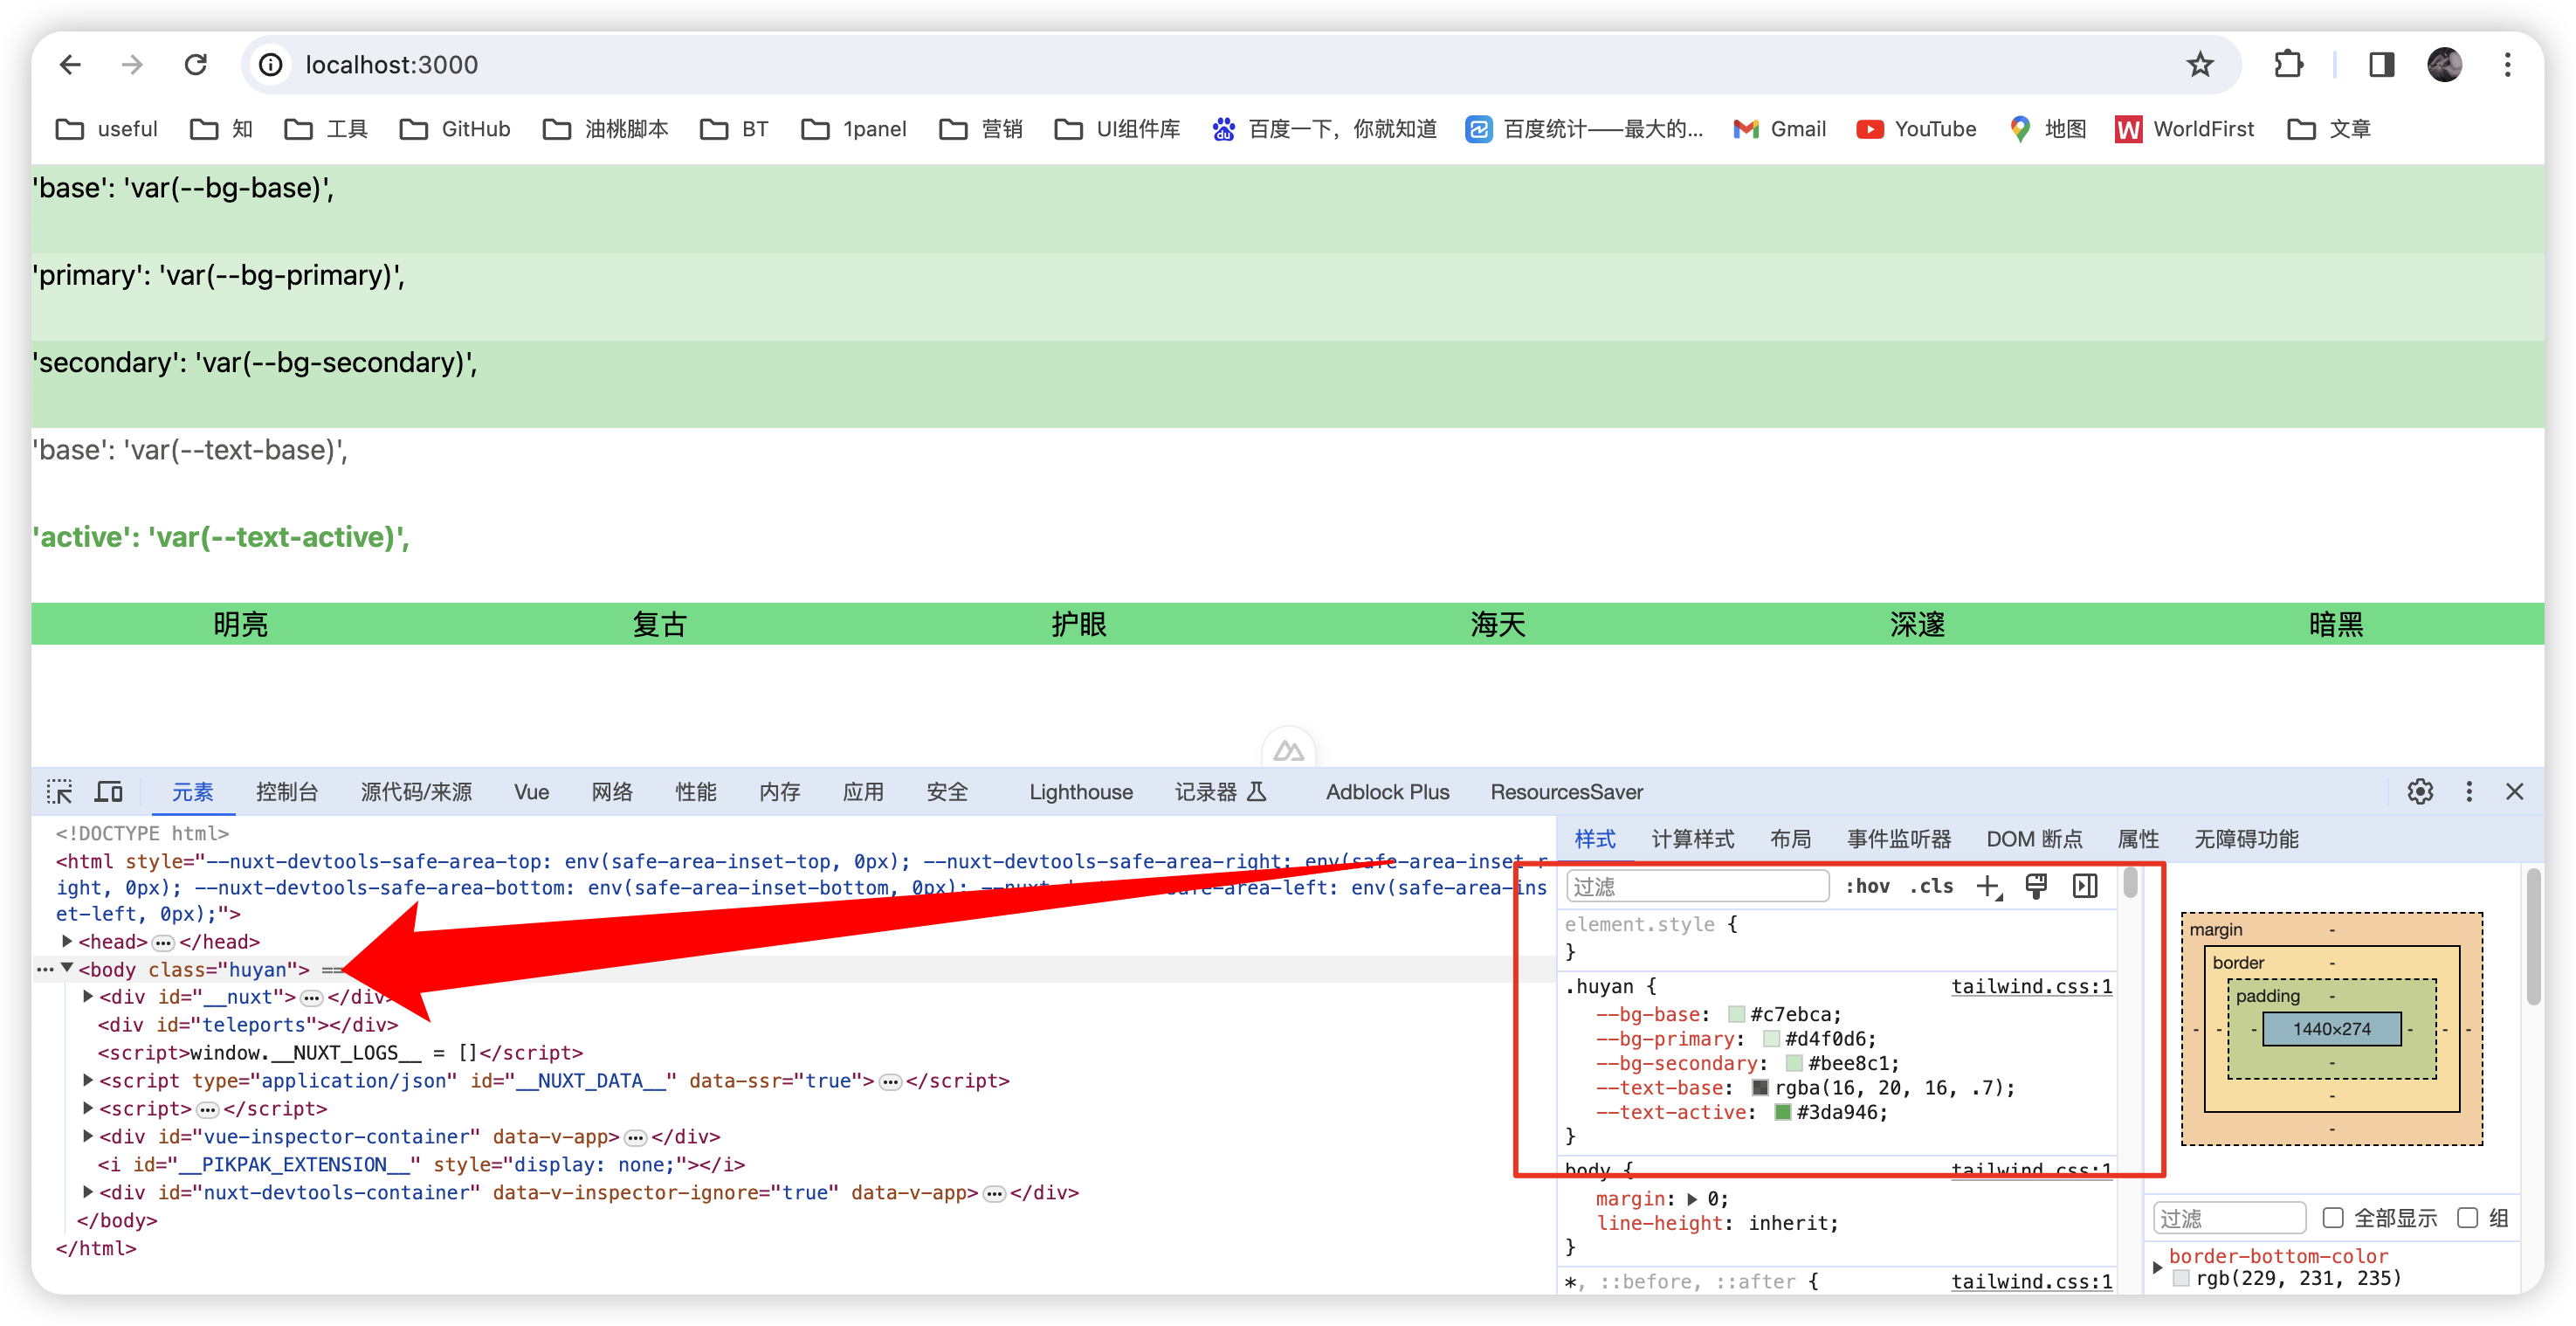
现在想要的效果已经达到了。非常的简单。
tailwindcss 设置css变量,实现主题配色样式切换
/archives/1710764019204